We took on a totally unplanned project last week. But who says no to a free swing set? Truthfully, we feel really lucky and grateful that our neighbors thought of our little family when giving away their swing set. I’ve been nervous about this summer and keeping my boys active because I will be a useless pregnant mammoth of a mother until August. We didn’t waste much time getting this sucker prepped for paint and ready for the boys to start enjoying.
*This post may contain affiliate links which means I receive a small commission if you purchase thru the links at no added cost to you.
You’ve likely seen a lot of DIY painted swing sets all over the internet. I’ve been curious myself about how doable this project is. I truthfully was so surprised how easy and fast we were able to pull this off. Swing sets can actually be pretty easy to come by. Just start keeping an eye on Facebook Marketplace or your local classifieds, and you will be able to scoop up something at a super reasonable price, maybe even FREE. Truthfully, the best part about a DIY project like this is that you don’t have to be meticulous in your detail work, and that’s a dream for Andy and me.

The Prep
We opted to keep the swing set mostly assembled for prep and paint. It made for a pretty easy couple of days of work this way.
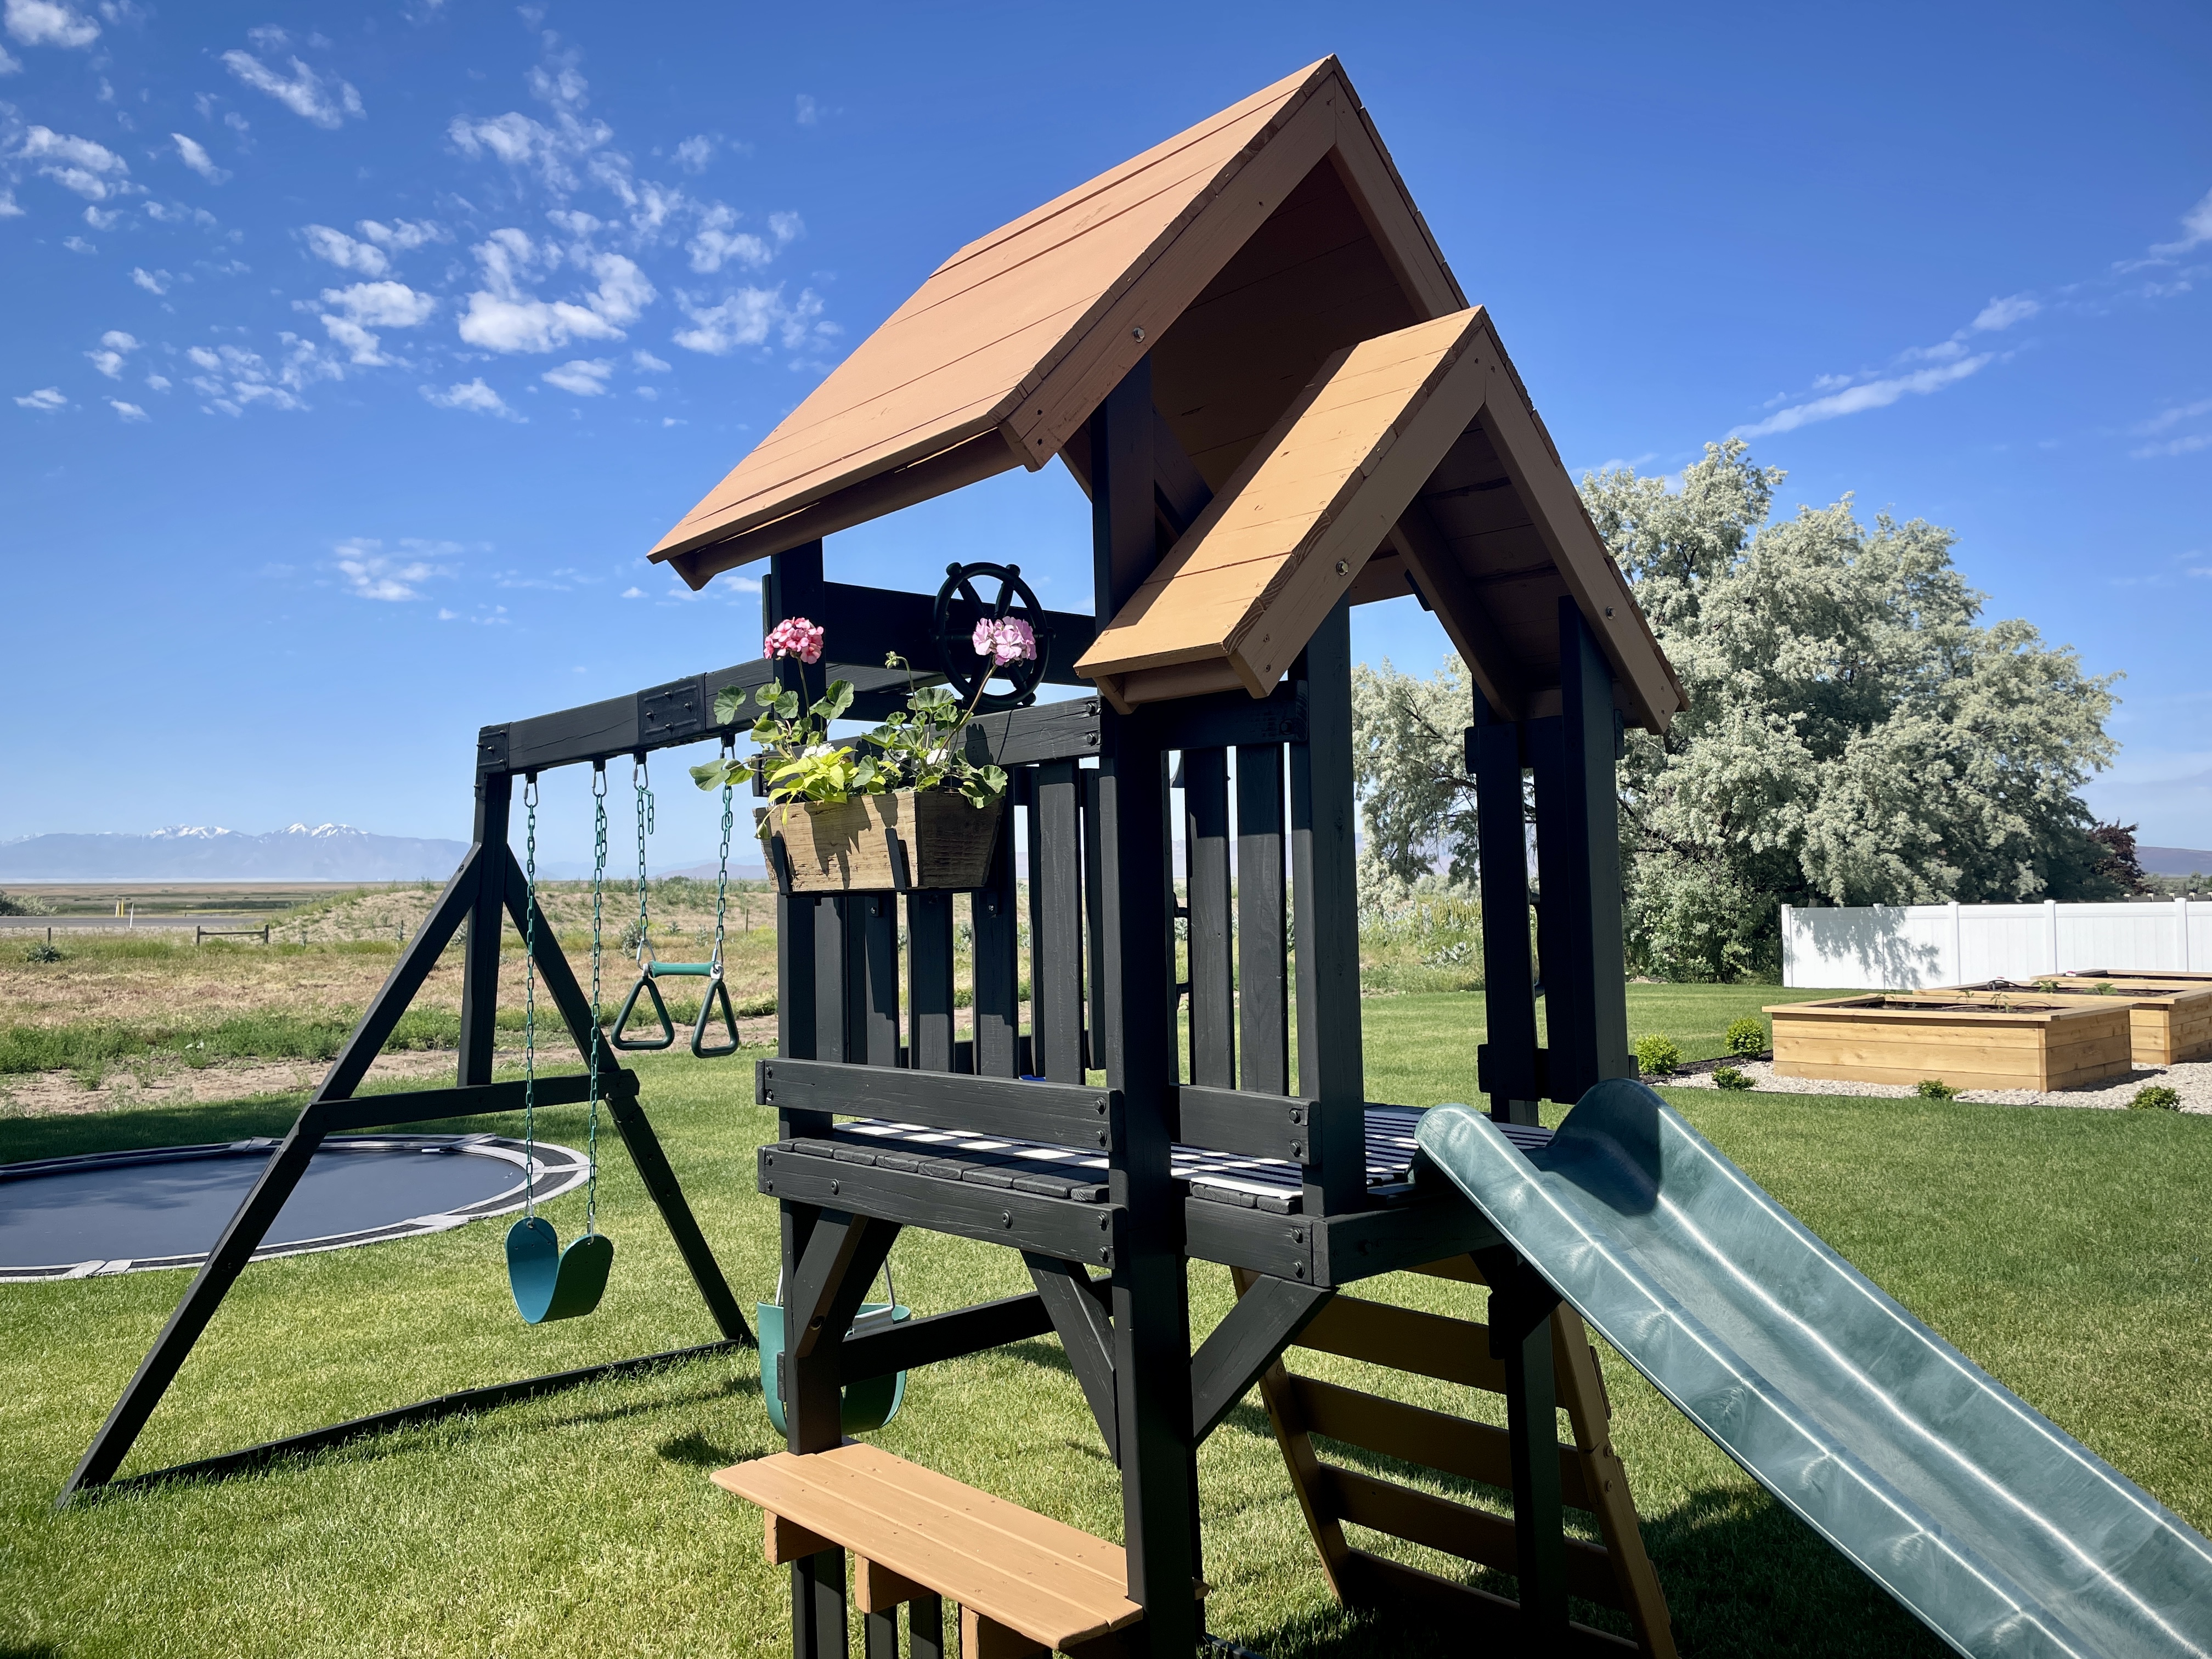
We started the project by first power washing the set. This will remove peeling paint and dirt making for an easier time sanding it down. I knew I wanted to paint the set black so we weren’t meticulous in our sanding efforts. We mostly aimed at smoothing the surfaces to limit risk of splinters.

The Roof
I wasn’t sure what we were doing about the roof. It was originally wrapped in a tarp like material that wasn’t going to paint easily. We ended up removing it entirely and reconstructed it using 1×3 pine planks that Andy cut down to custom fit. We used roughly 12 boards in total.

Painting
I consulted my wildly talented DIYer friend and neighbor and she put me in the perfect paint direction. We landed on this Behr solid color waterproofing stain and sealer. She sold me when she mentioned it will deter wasps and spiders nests from appearing. The coverage from this stain was exactly what I wanted. We went with colors slate and cedar and used about 2 gallons each for this project.
I wasn’t confident the stain would adhere properly to the hardware so we decided to tape it off. We would later use a basic black spray paint to cover those pieces.
Finishing Details
We’ve since added some really fun details to our little swing set. I put in a rug on the top deck to make it feel a more cozy. We switched out a couple basic pieces like hand grips and a new steering wheel so they matched better. The dinner bell is probably the boys favorite addition. They use it to call all then neighbor friends to come over and play. I also finished off with a cute little flower box. I was excited to add this and took Truman to the nursery to pick out his own flowers. It’s now his little summer project to keep them alive and thriving, wish him luck!
The swing set has been an overall hit with the boys. Truman especially has loved inviting all the neighbor friends over to enjoy it. After paint and the few upgrades we made, we are in this project for about $420. We’ve loved this fun addition to our backyard that will be cherished for years to come.


XO, Lauren